![Cario logo RGB blue-1.png]](https://knowledge.cario.com.au/hs-fs/hubfs/Cario%20logo%20RGB%20blue-1.png?height=50&name=Cario%20logo%20RGB%20blue-1.png)
Purpose
User Management in Cario allows Tenant Administrators to create, manage, and maintain user access for specific customers within a tenant. Proper user setup ensures that individuals only have access to the data and functionality required for their role, supporting security, governance, and efficient operations.
Only users with Tenant Admin or equivalent administrative permissions can add or modify users.
Benefits
Using structured user management helps to:
- Control access at a customer level
- Ensure users only see relevant data
- Assign correct permissions through roles
- Simplify onboarding and offboarding
- Maintain accurate and up-to-date user records
Scope
This article applies to Tenant Admins responsible for managing users across one or more customers within a Cario tenant.
Prerequisites
Before adding a user:
- Confirm you have Tenant Admin access
- Confirm the customer account the user should belong to
- Confirm the user’s role and required access level
- Ensure the appropriate role has already been created
How to Add a New User in Cario
- Log in to Cario using a Tenant Admin account
- Navigate to Administration and select Users
- Use the Customer lookup field to search and select the relevant customer
- Click the plus icon to create a new user
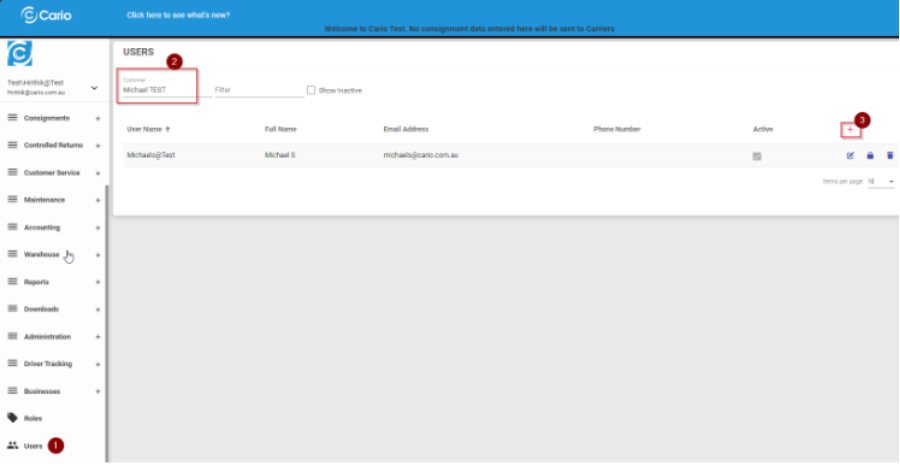
The user created will only have access to the selected customer’s data and will not be able to view or access other customers within the same tenant. If you leave the customer field blank, the user created will be a tenant user having access to data of all customers created under the tenant.
Entering User Details
When the user creation screen opens, enter the user details exactly as provided by the customer. These details typically include:
- First name
- Last name
- Email address (used for login and notifications)
- Username (if applicable)
- Contact details
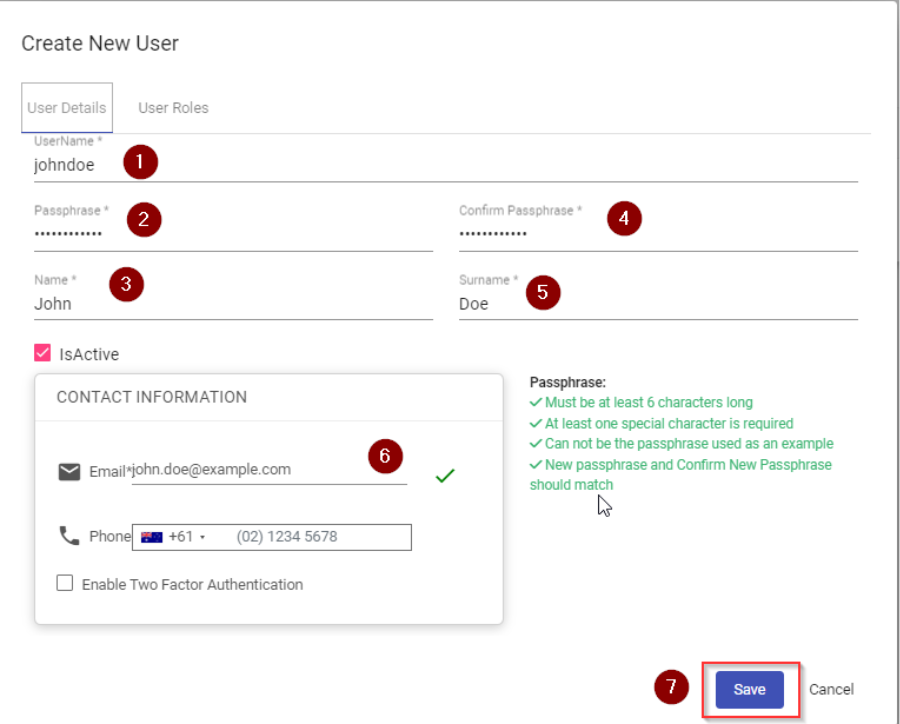
Accuracy is important, as incorrect details may prevent the user from logging in or receiving notifications.
Once all required fields are completed, proceed to role assignment.
Assigning a Role to a User
- Navigate to the User Roles tab within the user profile
- Select the appropriate role based on the user’s job function
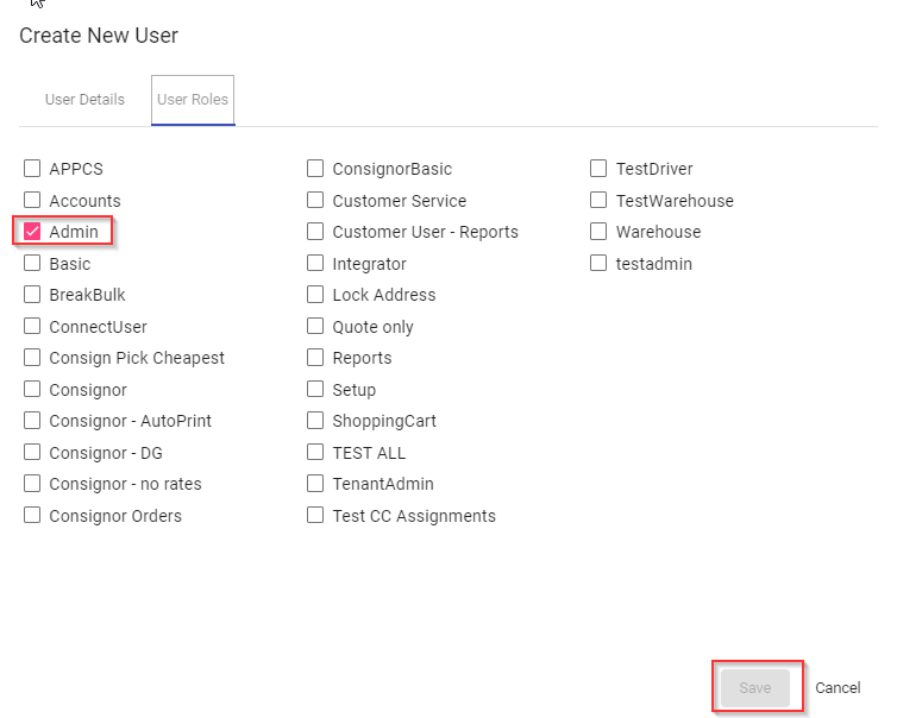
Examples:
- Managers are typically assigned broader roles with operational and reporting access
- Customer Service users are usually restricted to Customer Service and visibility functions
- Warehouse users are assigned Warehouse-specific roles
- Accounts users are assigned finance and reporting roles
- Select the role
- Click Save to apply the changes
The role determines what menus, actions, and data the user can access within Cario.
Editing an Existing User
To update an existing user:
- Navigate to Administration and select Users
- Search for the user by name or email
- Open the user profile
- Update user details or assigned role as required
- Click Save to confirm changes
Changes take effect immediately once saved.
User Access Scope and Visibility
Users in Cario are restricted by:
- Customer assignment
- Assigned role permissions
A user:
- Can only see data for the customer they are assigned to
- Cannot view other customers unless explicitly assigned
- Can only perform actions allowed by their role
This ensures data separation and security within multi-customer tenants.
Best Practice Guidelines
- Always assign users to the minimum role required for their job
- Avoid sharing logins between users
- Review user access regularly
- Disable or remove users who no longer require access
- Keep role management separate from user creation